


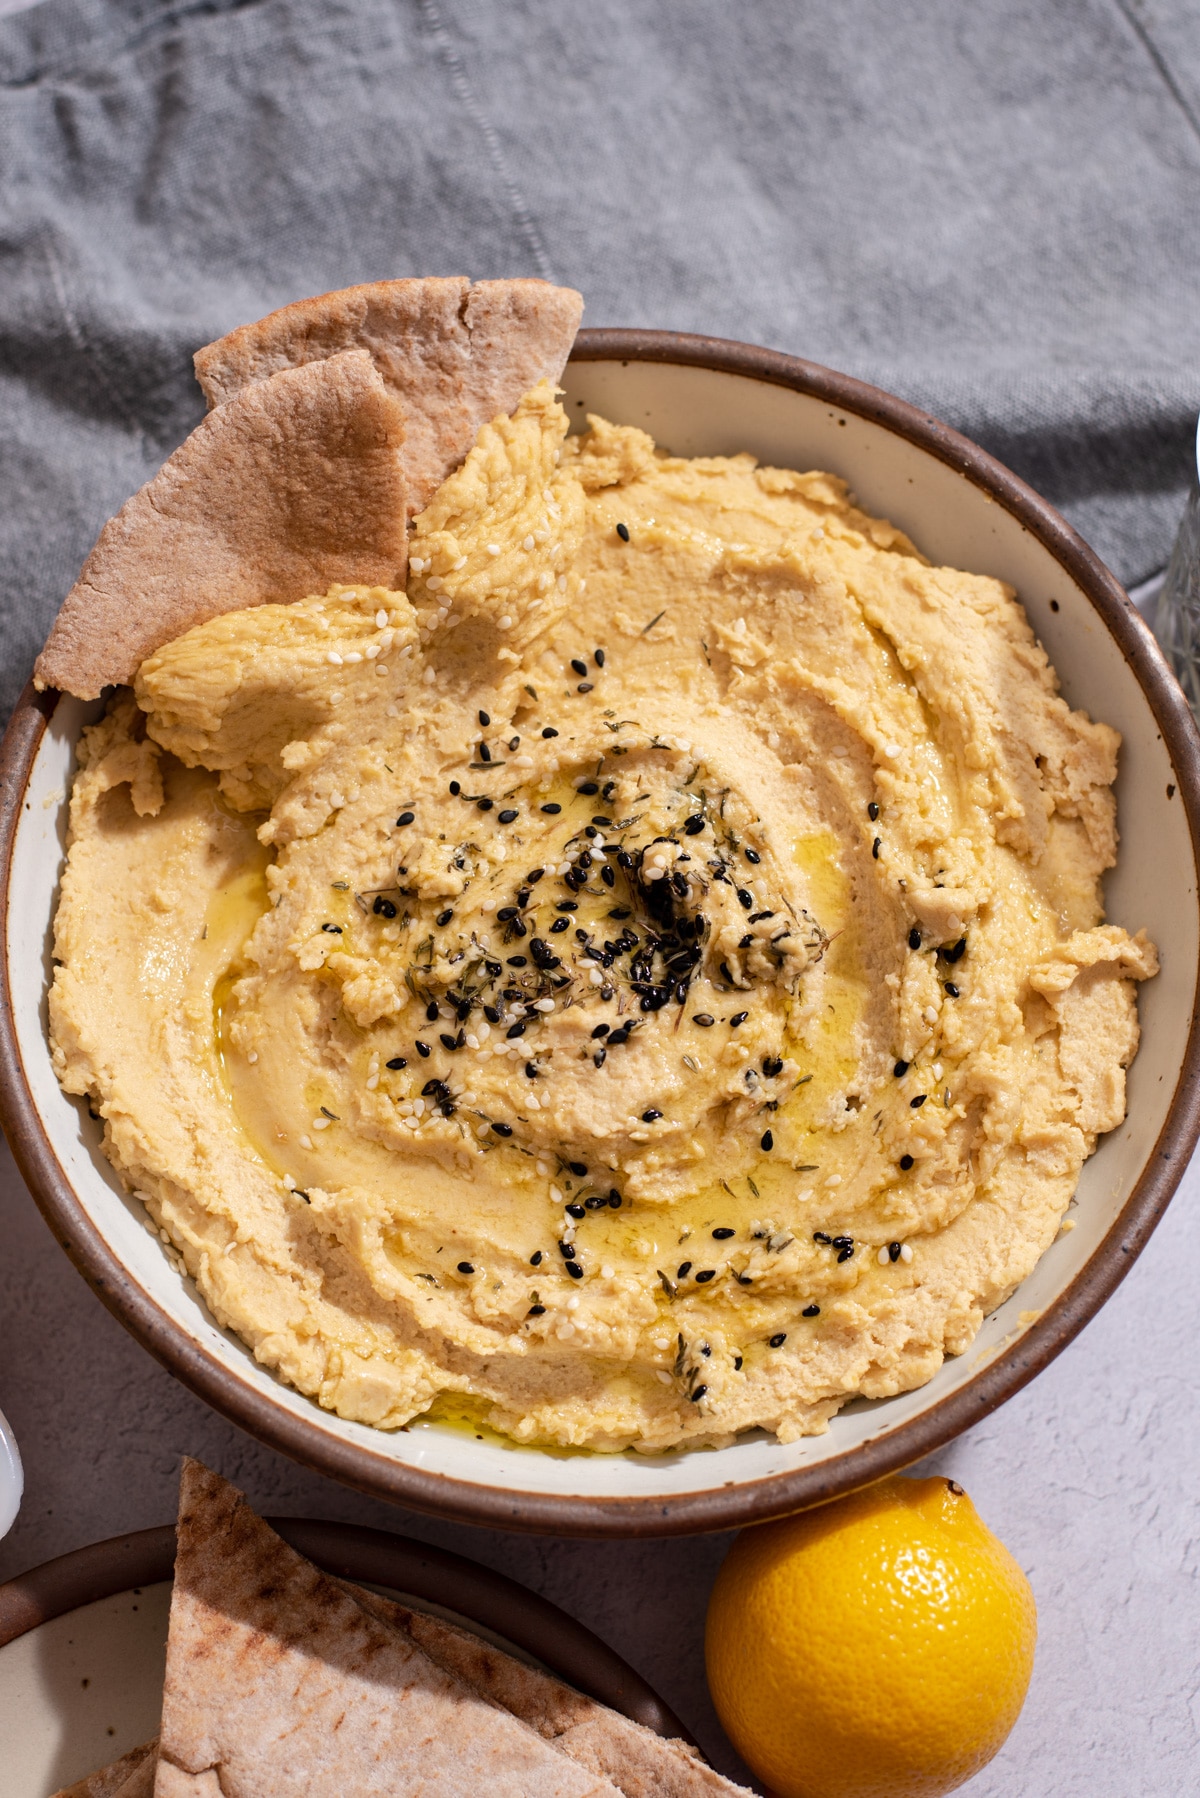
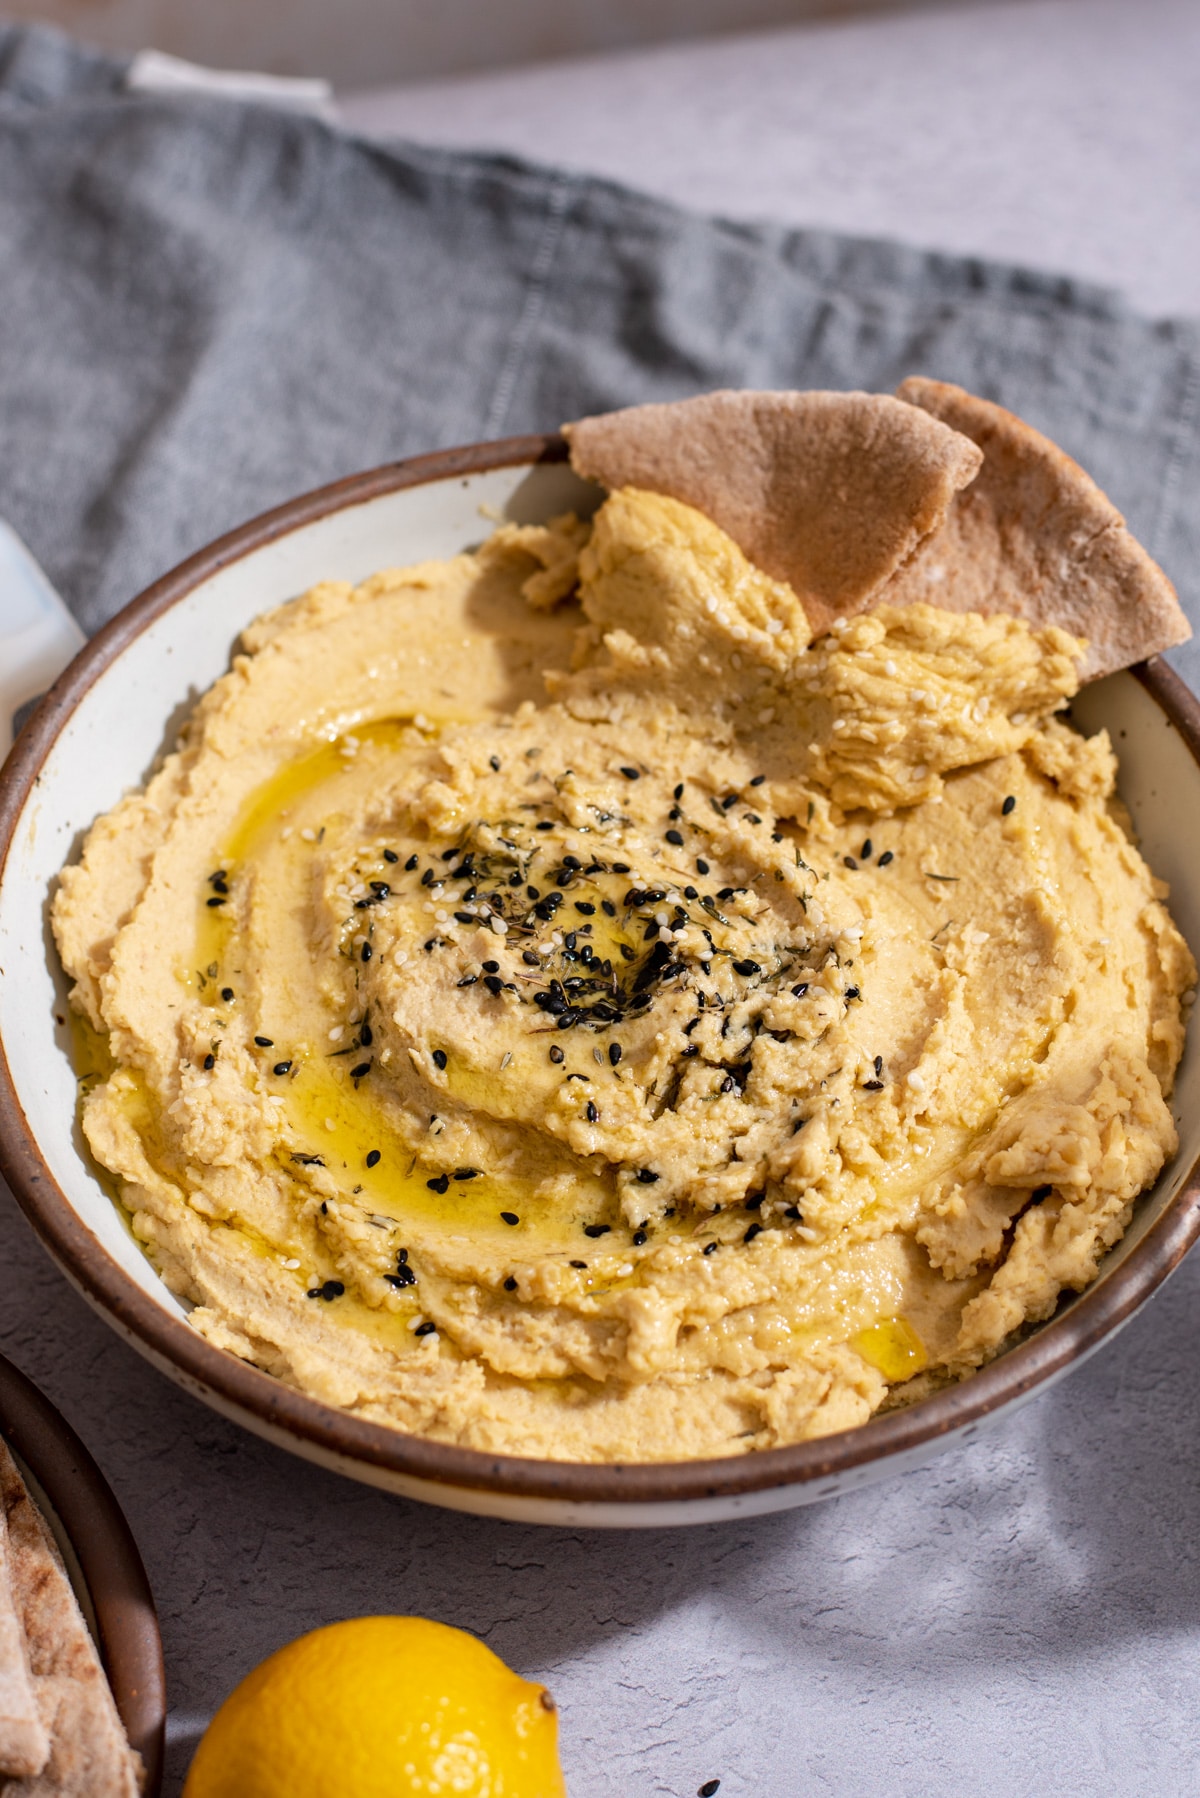
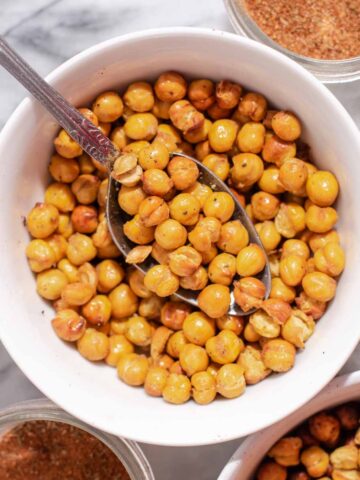
This homemade hummus is ultra-creamy and easy to make using a handful of simple ingredients. It's even better than store bought and comes together with just 5 minutes of active time!
If you're new to hummus, it's a Middle Eastern and Mediterranean chickpea-based spread made with tahini, lemon juice, and garlic. It comes in a lot of different varieties in the grocery store, and I already have two other versions on the blog (black-eyed pea hummus and jalapeno hummus).
My homemade hummus is definitely not authentic, but I find myself making it almost every week because it's so easy to make and is very versatile.
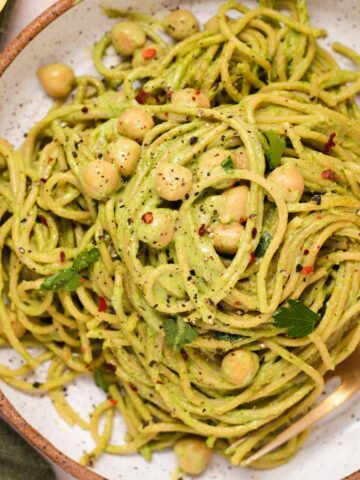
Hummus is great as a dip with veggies or pita bread, on hummus avocado toast, as a centerpiece in hummus bowls, and even used as a hummus pasta sauce!
Jump to:
Recipe features
- Quick & easy: Made with just 6 ingredients in 15 minutes
- Freezable: Homemade hummus can be frozen for up to 3 months
- Customizable: Easy to customize to be smooth or chunky
- Versatile: Spread on toast or sandwiches, serve as a dip, or use as a sauce
I've only ever found one store bought hummus that I love (King Harvest, check them out if you live in Oregon!). Since I no longer live in Oregon, I've been making this hummus at home for years to bridge the gap.
I prefer my hummus on the chunkier, scoopable side instead of ultra-smooth, but this guide includes tips to achieve both textures.
Ingredients
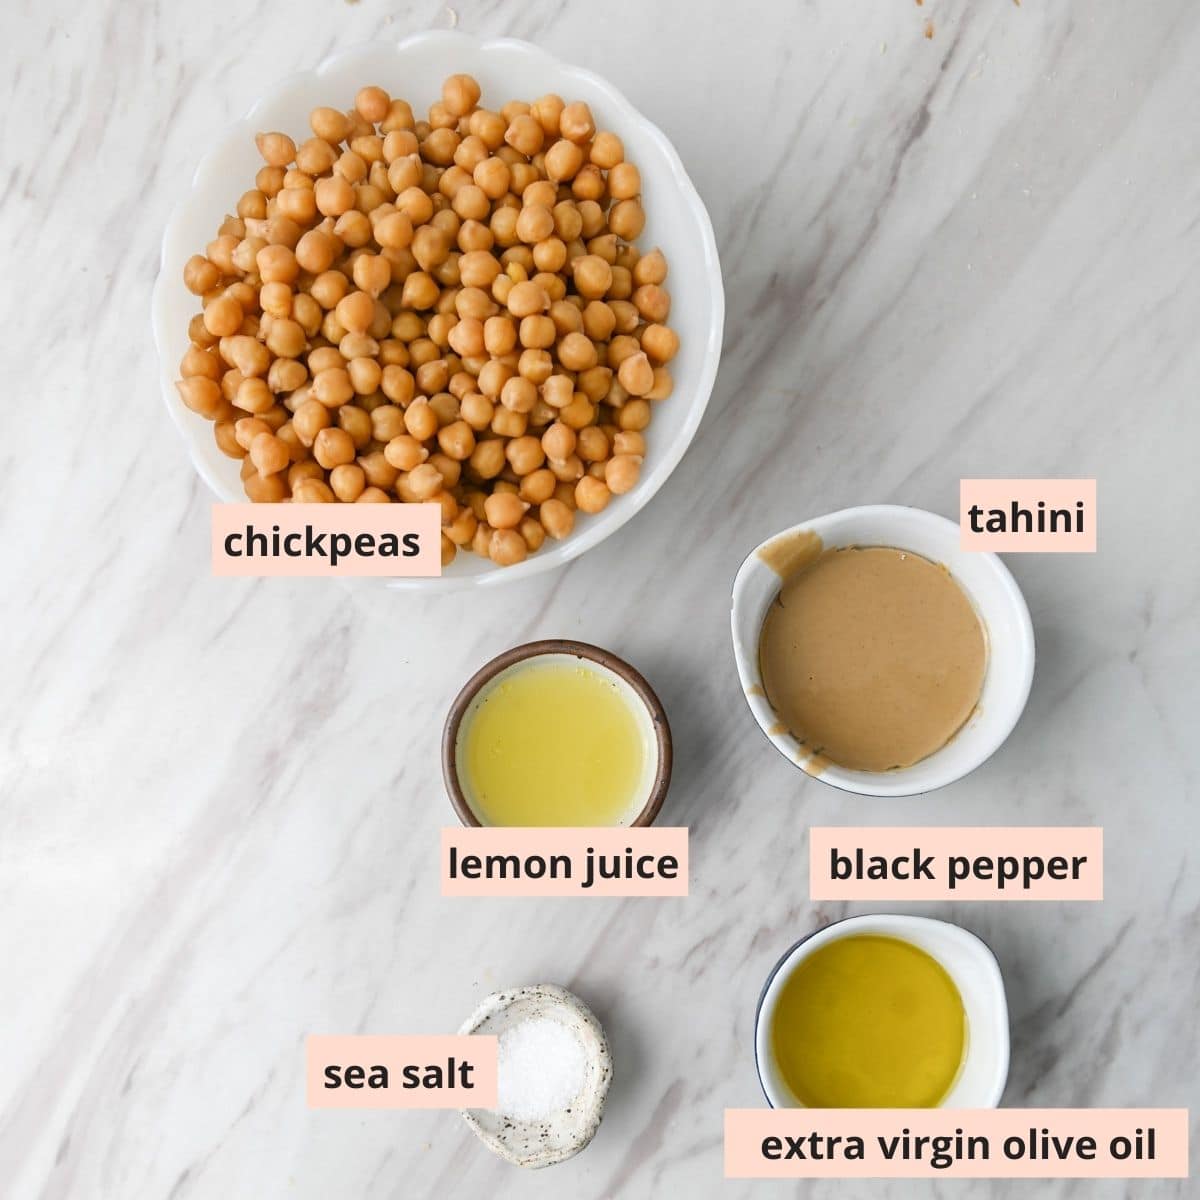
- Chickpeas, AKA garbanzo beans. I like to use Instant Pot chickpeas from dry chickpeas, but canned chickpeas also work.
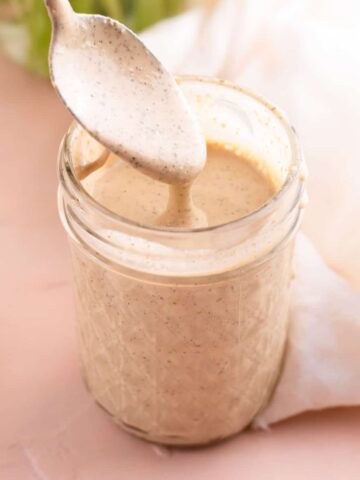
- Tahini is just ground sesame seeds. You can usually find it in the peanut butter aisle or the International aisle. Make sure to stir it well before using.
- Lemon juice adds zest and brightness. For the best flavor, I recommend using fresh lemons and not bottled lemon juice.
- Ice water: Place a few ice cubes in a glass filled with water. This cold water helps to thin the hummus and make it more fluffy.
- Extra-virgin olive oil isn't always included in hummus, but I find that it adds a great mouthfeel and flavor. Avocado oil also works.
- Sea salt: Add to taste.
- Raw garlic adds a pretty strong garlic flavor. Adjust as needed.
Step by step instructions
Step one: In a food processor with a standard blade attachment, whip together the tahini and lemon juice for 30 seconds to a minute. It will become thicker and the tahini may appear lumpy, that's okay.
Whipping the tahini lightens it up and results in a creamier hummus.
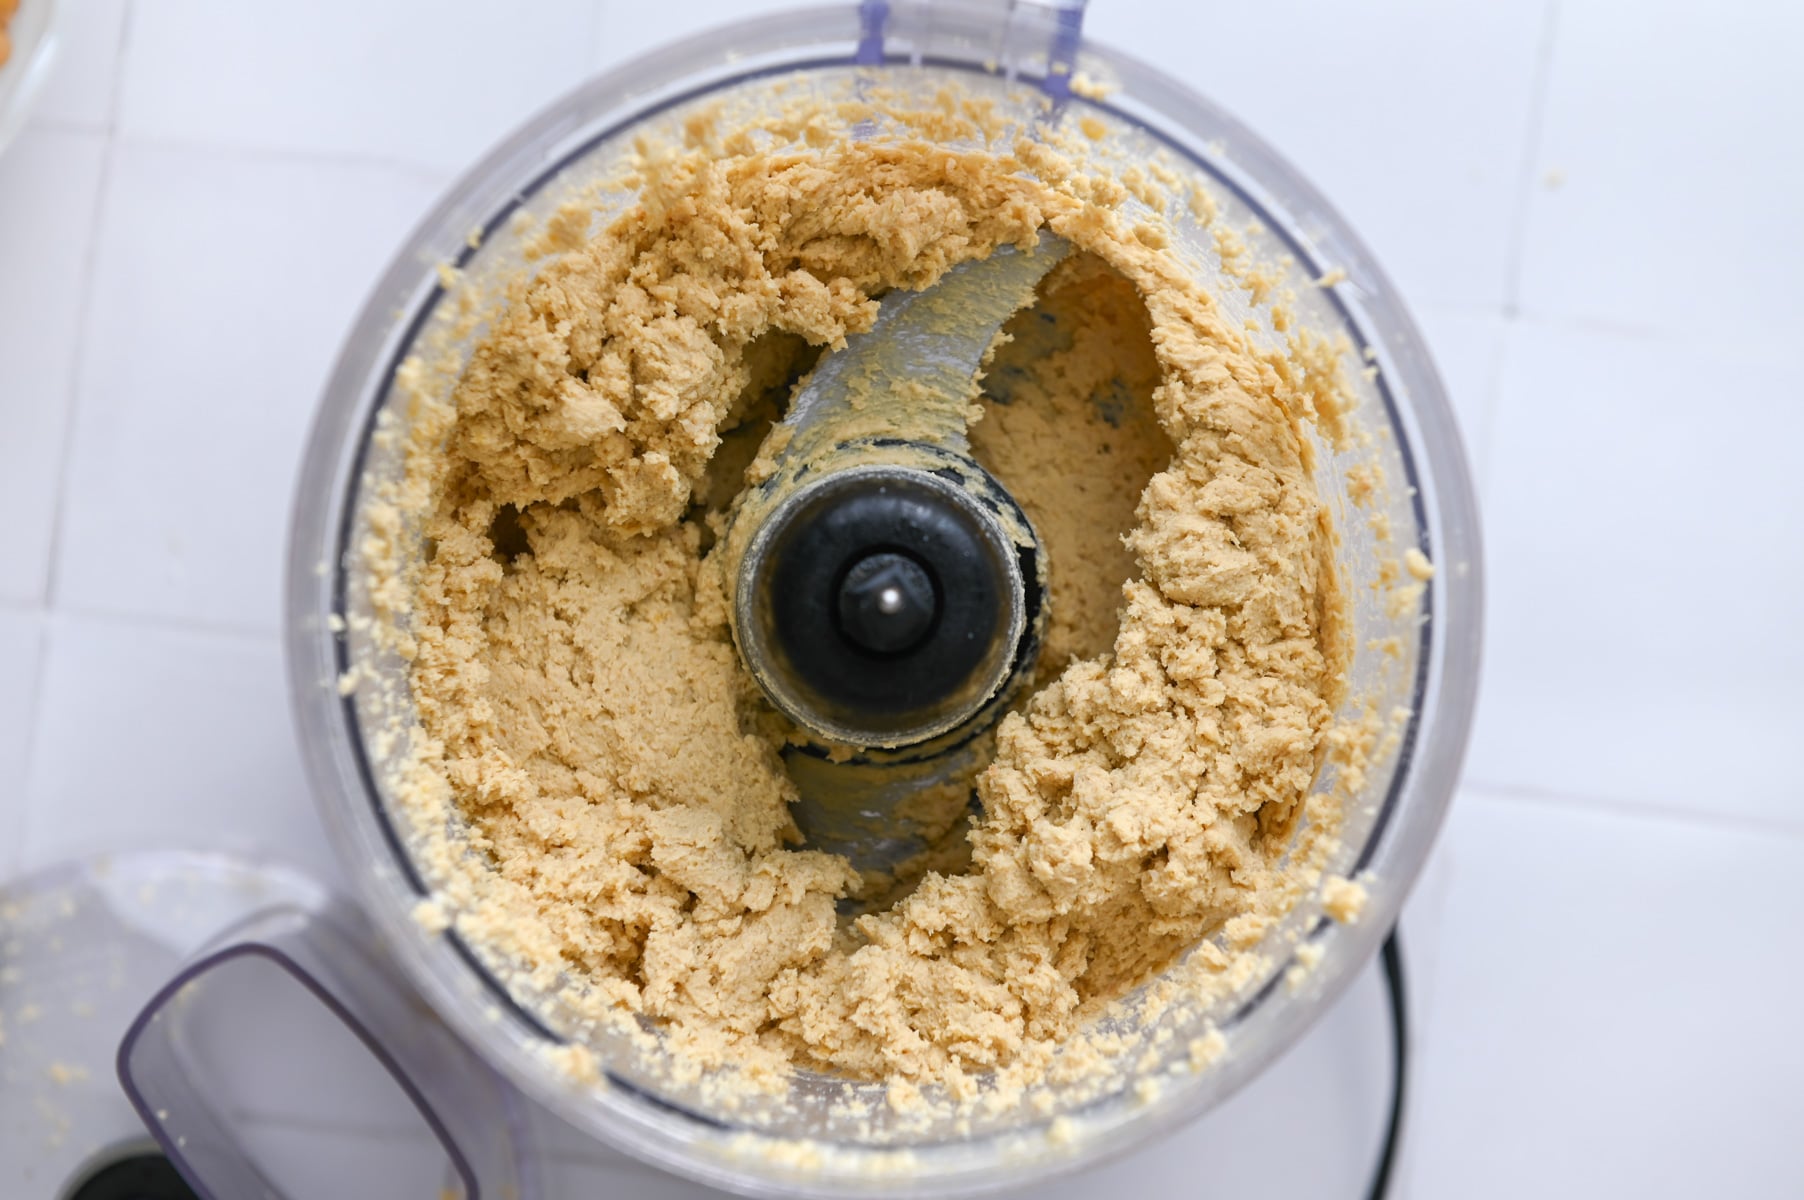
Step two: Add the warm chickpeas. Process on low speed. While the food processor is running, drizzle in 3 tablespoons of olive oil. Scrape down the sides of the food processor as needed. At this point, the hummus should still be fairly thick.
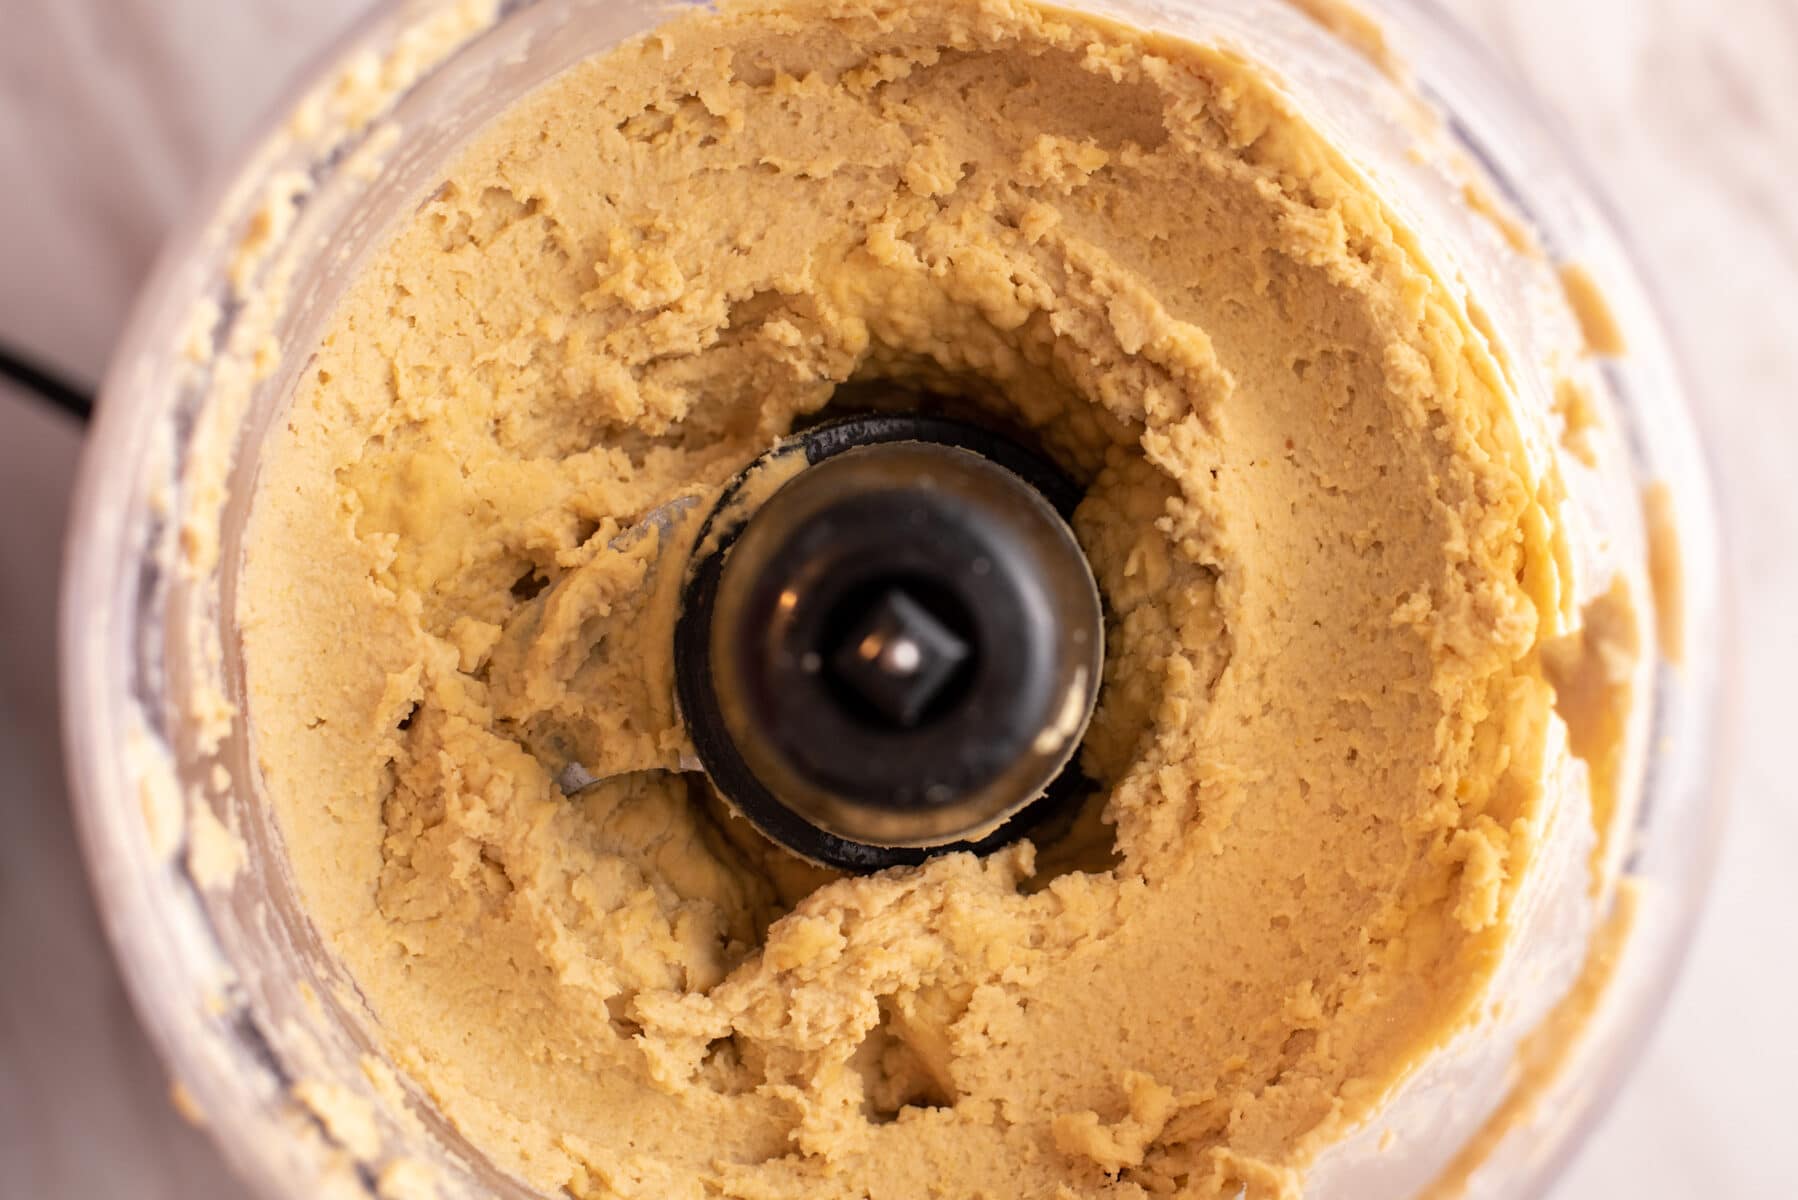
Step three: Add ice water 1 tablespoon at a time, until the hummus reaches desired consistency.
Step four: Once the hummus is smooth, add the salt and sliced garlic. Process another 30 seconds. Taste for salt and add extra ice water as needed.
Serve topped with an extra drizzle of olive oil and sesame seeds or Za'atar seasoning.
Cassidy's tips
These are my go-to tips for creamy, light, and fluffy hummus:
- Use warm chickpeas: Chickpeas are naturally starchy, but heating them up causes this starch to break down and create a smoother hummus (trust me!). Simmer canned chickpeas for at least 10 minutes for the best result.
- Skin your chickpeas: This is the most tedious tip and one that I usually don't follow myself. Combine one can of chickpeas with 1 teaspoon baking soda while simmering the chickpeas. Rinse thoroughly with cold water, then place in a large bowl filled with more cold water. Agitate the chickpeas with your hands to cause the skins to separate from the chickpea. The skins should float to the top and be easy to strain out of the water.
- Add ice cold water: This makes the hummus more fluffy and helps to thin it out. Add water just 1 tablespoon at a time. This gives you control over the consistency of the hummus.
- Use a food processor and scrape down the sides with a scraper attachment or spatula as you process the hummus. Because hummus is thick, I only recommend using a blender if it's very strong (like a Vitamix) or if you prefer a thinner hummus.
- To make flavored hummus: I recommend adding in any add-ins, like kalamata olives or sliced jalapeno, when you add the sliced garlic. Pulse the mixer to break them down, or process on low just until coarsely chopped.
Storage and serving notes
Hummus is a great appetizer because it can be served with warmed pita points, seed crackers, carrots, celery, etc. I also enjoy it spread on hummus toast or in sandwiches.
Leftovers are best within 5-6 days. Keep refrigerated in an airtight container.
To freeze: Hummus freezes well. Because this recipe makes a fair amount of hummus, I usually freeze half of it in an airtight container. It will keep for up to 3 months and can be thawed overnight in the fridge.
Looking for similar recipes?
I use tahini and chickpeas in many of my plant-based recipes. Here are a few of my favorites:
Did you try this recipe? You can leave a star rating in the recipe card or a review in the comments below. Or check out my cookbook and keep up to date with my YouTube, Instagram, TikTok, or newsletter!
Recipe
Want to Save This Recipe?
Enter your email & I'll send it to your inbox. Plus, get great new recipes from me every week!
By submitting this form, you consent to receive emails from Cozy Peach Kitchen

Creamy Homemade Hummus
Ingredients
- 3 cups chickpeas see note #1
- ⅔ cup tahini
- ¼ cup lemon juice from 2 medium lemons
- 3 tablespoons extra virgin olive oil
- 2-4 tablespoons ice water more as needed
- ½ teaspoon sea salt adjust to taste
- 3-4 cloves garlic sliced; adjust to taste
Instructions
- If using canned chickpeas, add the chickpeas with juices to a medium saucepot. Simmer over medium heat for 10 minutes. Drain and rinse chickpeas before using.
- In a food processor with a standard blade attachment, add ⅔ cup tahini and ¼ cup lemon juice. Process on low for 30 seconds to a minute, until creamy.
- Add the warm chickpeas. While the food processor is running, drizzle in 3 tablespoons of olive oil. Scrape down the sides of the food processor with a spatula as needed.
- While the food processor is running, add ice water 1 tablespoon at a time until the hummus is thinned to your desired consistency.
- Add salt and sliced garlic cloves. Process another 30 seconds. Taste for salt. Enjoy with pita or veggies.
Video
Notes
- Chickpeas: Equals two 15 ounce cans of chickpeas. Drain and rinse before using. I cook chickpeas in the Instant Pot.
- For ultra-creamy hummus, I recommend skinning the chickpeas. I don't usually do this because it's tedious, but it works. Add 1 teaspoon baking soda to the simmering chickpeas. Drain and rinse thoroughly, then add chickpeas to a large bowl of cold water. This will make the skins much easier to remove.
- This recipe makes about 2 and ½ cups of hummus. Hummus is best within 5-6 days and should be stored in an airtight container in the fridge. It can be frozen for up to 3 months.
Shirley says
It sounds very good.. I go to a great lengths to pick up Hummus at various Middle Eastern Restaurants
Because store bought has never appealed.
I go 25 / 50 miles from home and pick up at favorite places, whichever I am near. 16oz takeout lasts 2 weeks. And I do freeze
I hope this is as good as I crave
Cassidy Reeser says
I'd love to hear what you think!