


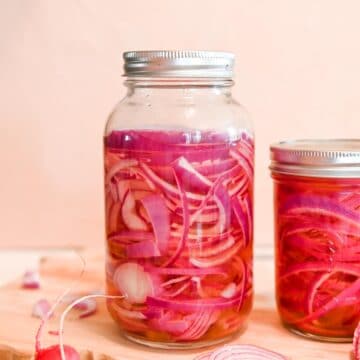
Learn how to make bright, tangy, and flavorful quick pickled onions in just 10 minutes with this easy recipe! You can put pickled onions on everything, from bowls to burritos and sandwiches to salads!
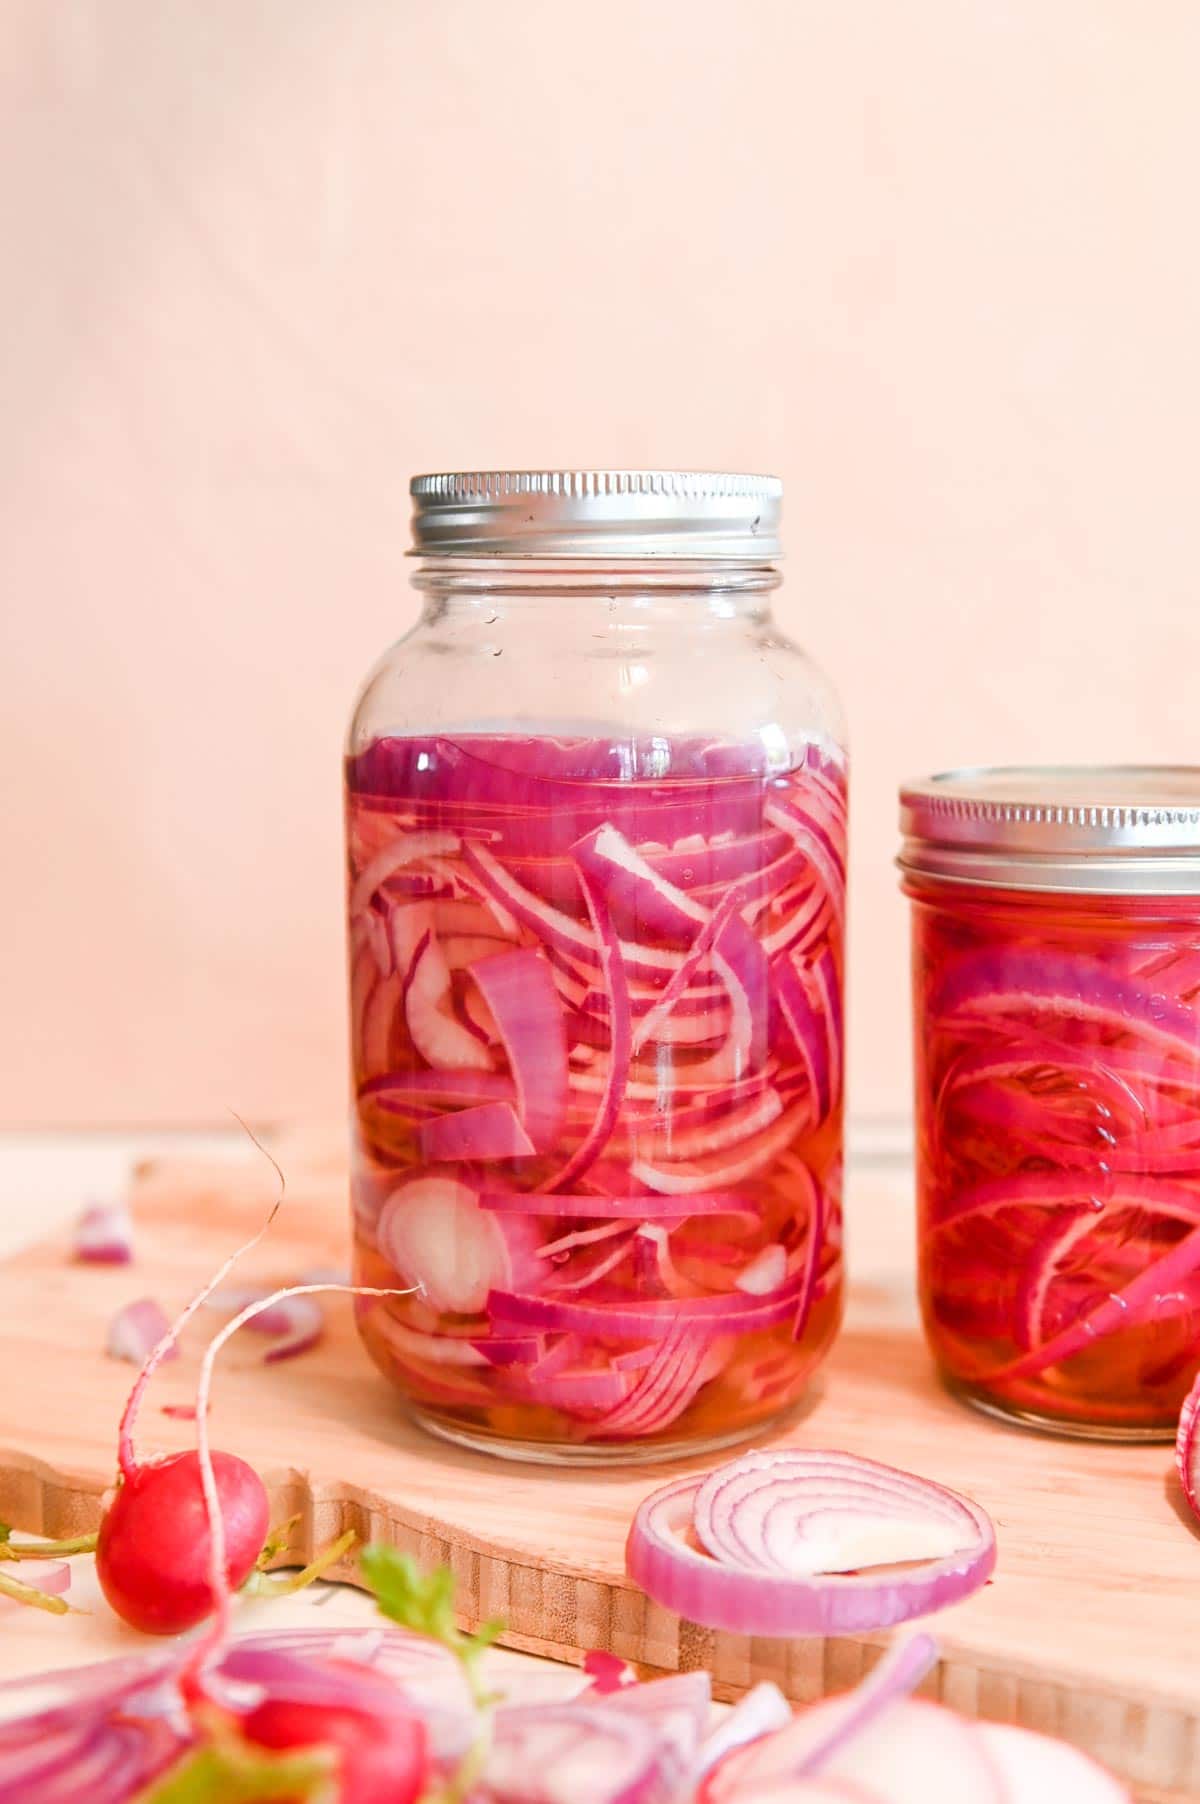
I make quick pickled red onions more often than any other condiment. They add a wonderful pop of acidity to burrito bowls, tacos, and this tofu salad.
My method for quick pickling requires just a few minutes of active time. You don't even have to boil the water and vinegar mixture before adding the sliced red onions. And, yes, this recipe also works with white and yellow onions!
Jump to:
Recipe features
- Bright, tangy and milder than raw red onions
- Requires just 10 minutes of active time and ready in 2 hours
- Lasts for 2 weeks in the fridge
- Easy to customize and get creative with the flavors
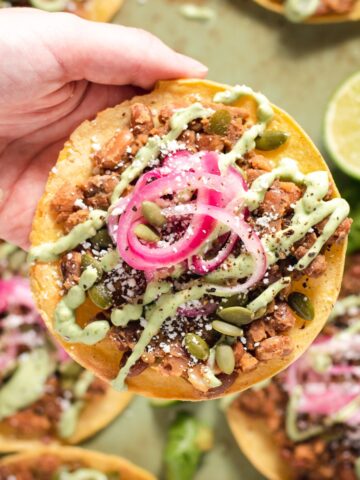
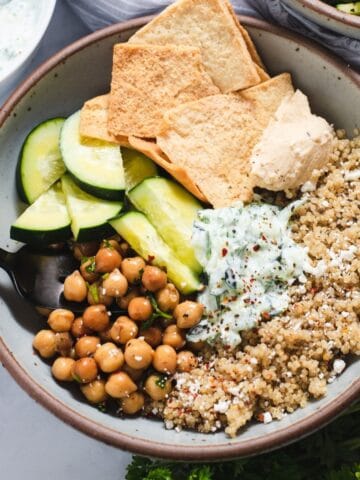
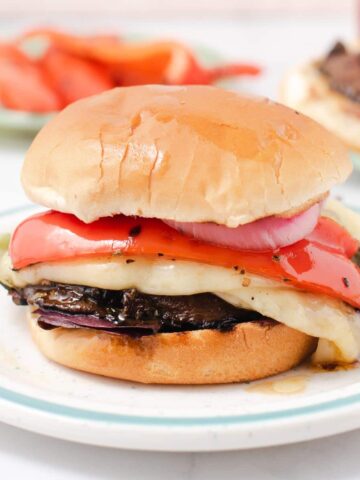
- Pickled onions are great as toppings on grain bowls, tacos, burritos and in sandwiches
Ingredients
There are SO many ways to quick-pickle onions. This base recipe lends itself to many possibilities. You can get as creative as you want with add-ins or keep it as simple as you like.
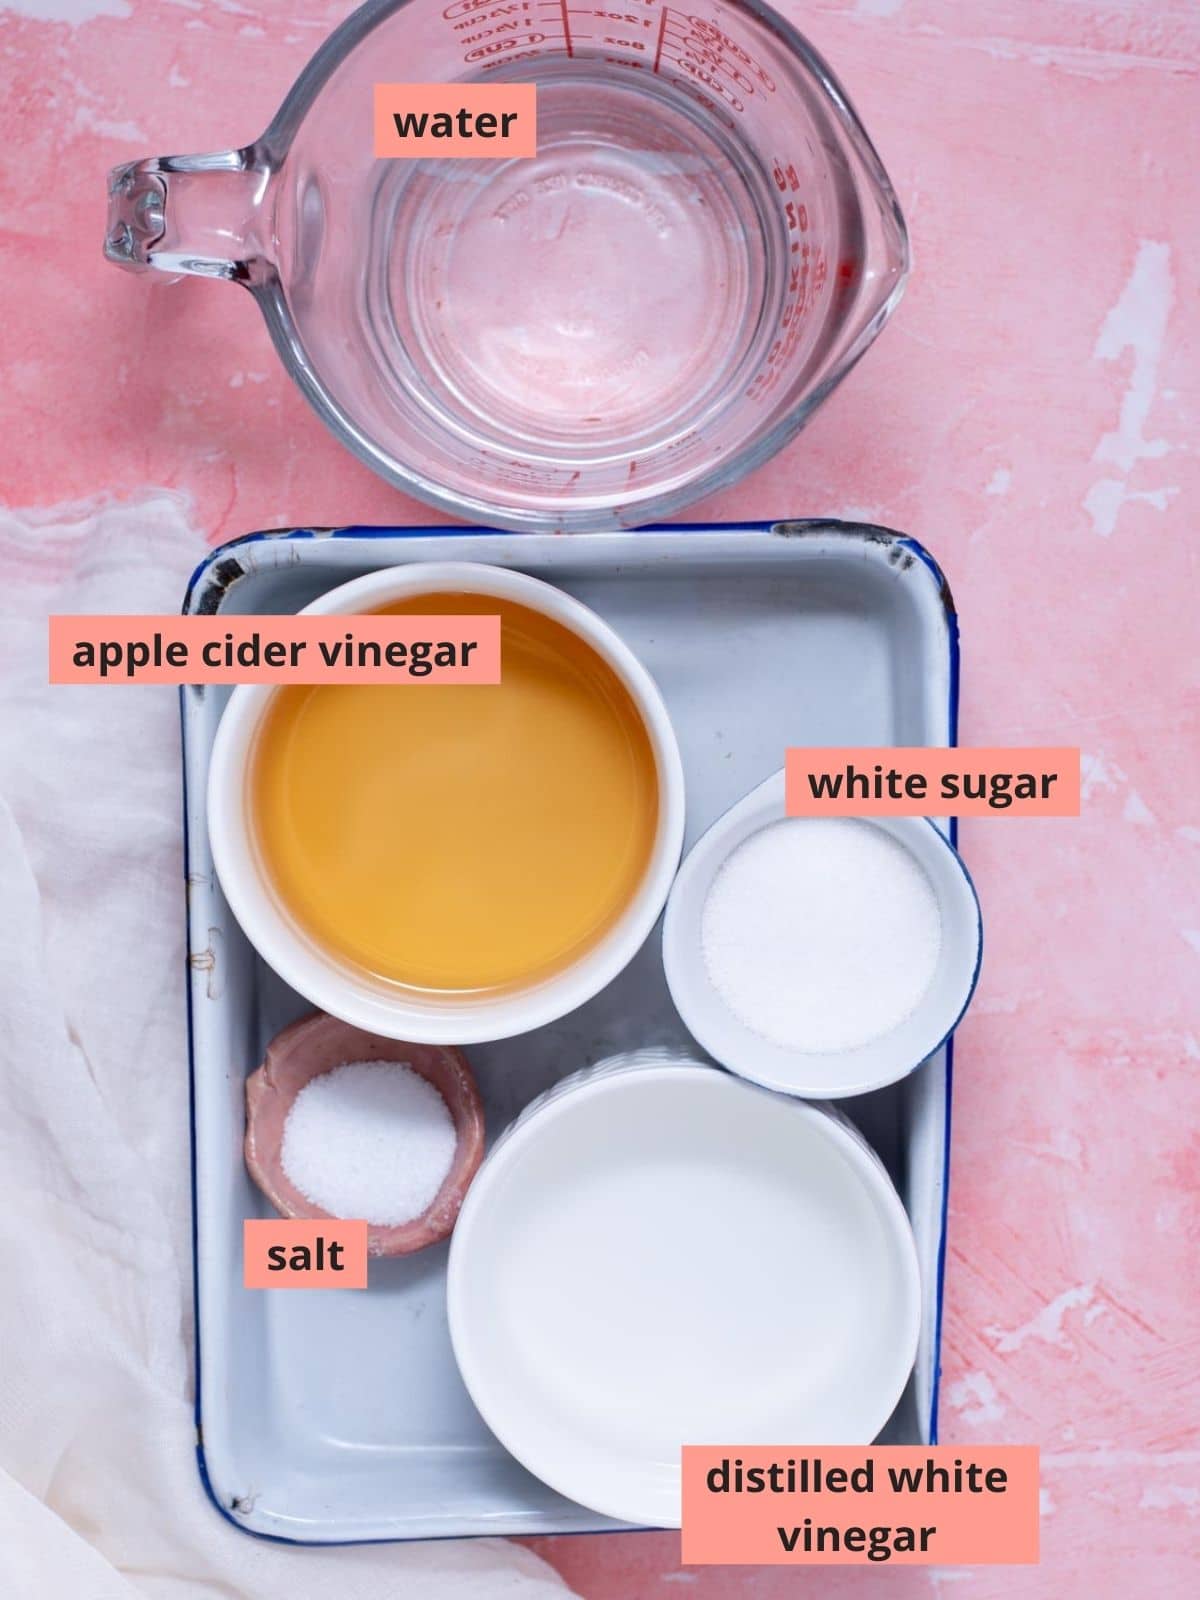
- Red onion: One medium onion is all you need to make a quart-sized jar of pickled onions. This method does work with white or yellow onions as well.
- Vinegar: I use a mix of distilled white vinegar and apple cider vinegar. The cider vinegar lends a slightly sweet and fruity flavor. Vinegar is necessary for the pickling process.
- Water: I use spring water for the purest flavor but tap water works just fine.
- Salt: Coarse salt like kosher salt or sea salt have different volumes, so I use table salt for the most consistent results.
- Sugar: White sugar enhances the onion flavor and helps cut through the acidity. It doesn't actually make the brine very sweet. You can use maple syrup or honey instead.
Step by step instructions
Always start with clean, freshly washed jars, lids, and rings. And hands! This helps the quick pickled red onions to last longer.
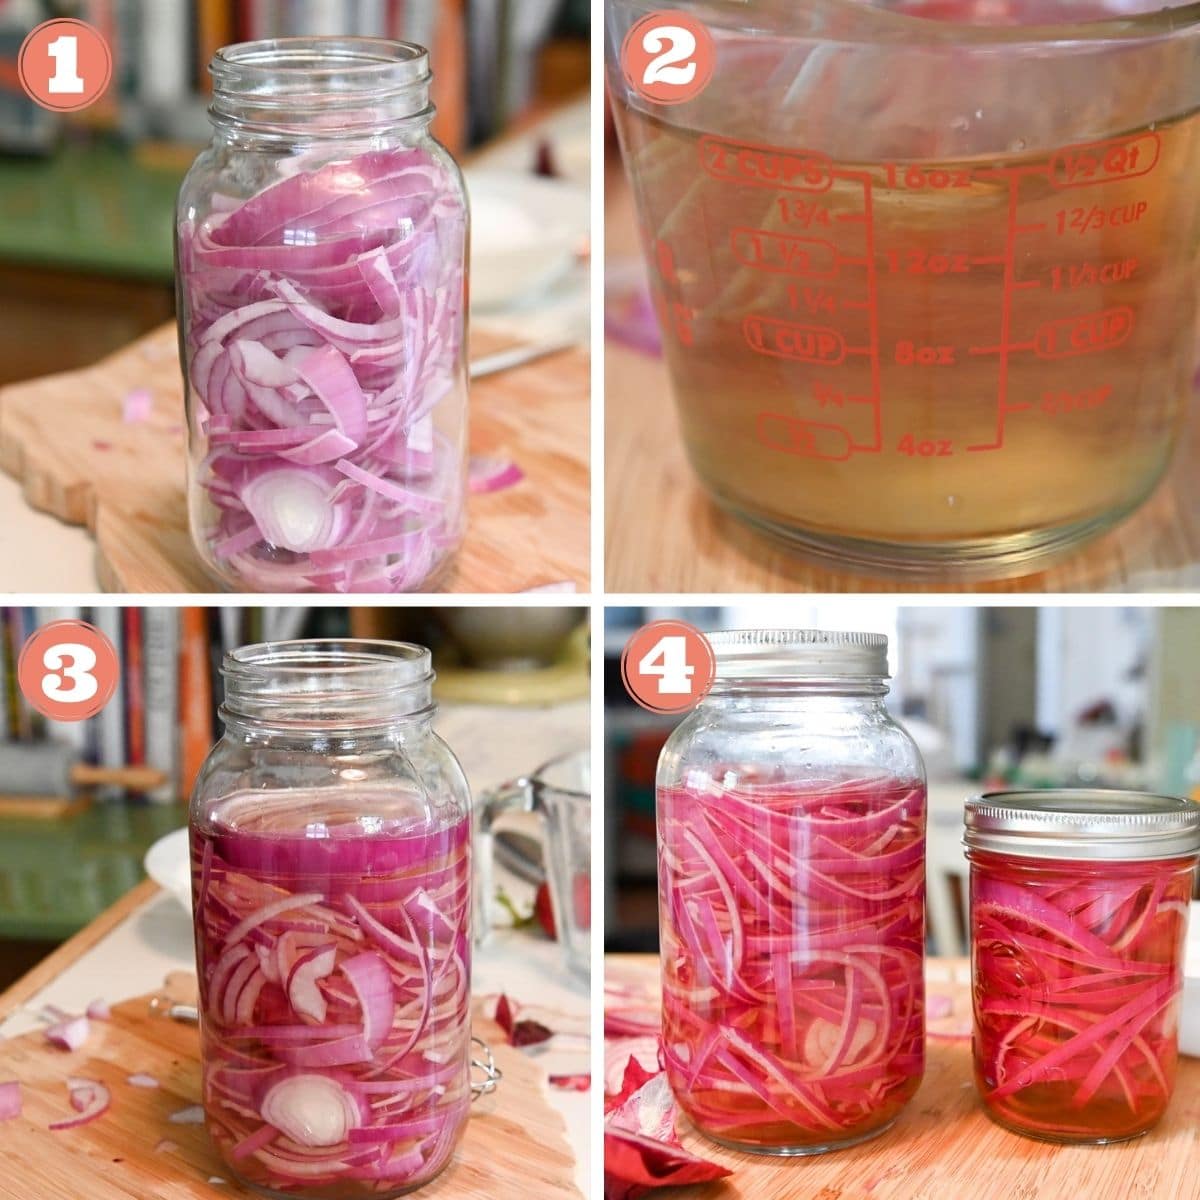
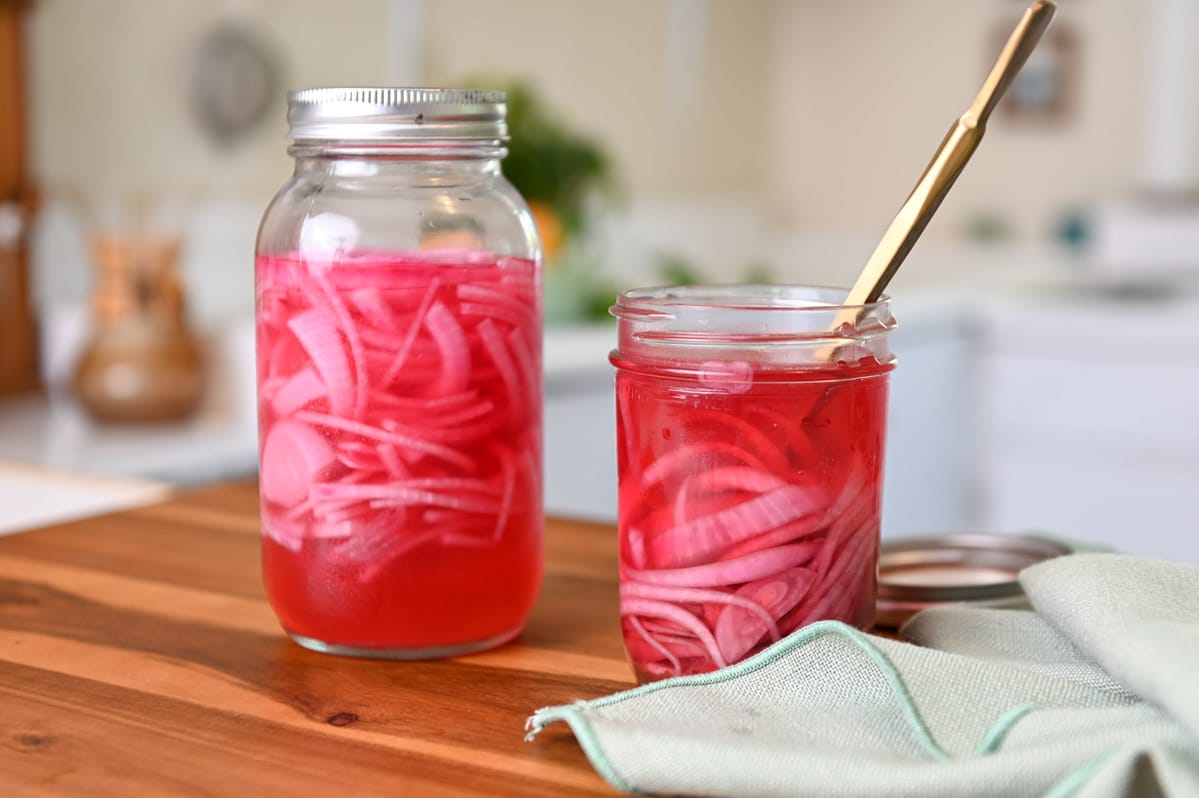
Step one: Start by slicing a medium red onion in half and removing the core. Slice the onions very thin. A mandolin would work well here if you have one but you should be able to slice them very thinly with just a knife.
Use your hands to separate the slices apart before adding them to a quart-sized mason jar or any kind of closeable container.
Step two: Add all of the brine ingredients to a measuring cup. Whisk together until the salt and sugar are dissolved. This should take about 30 seconds.
Pro tip: Taste as you go so that you can adjust the salt, sugar, and vinegar types to your preference.
Step three: Cover the onions in the brine. Place a lid on it and transfer it to the fridge.
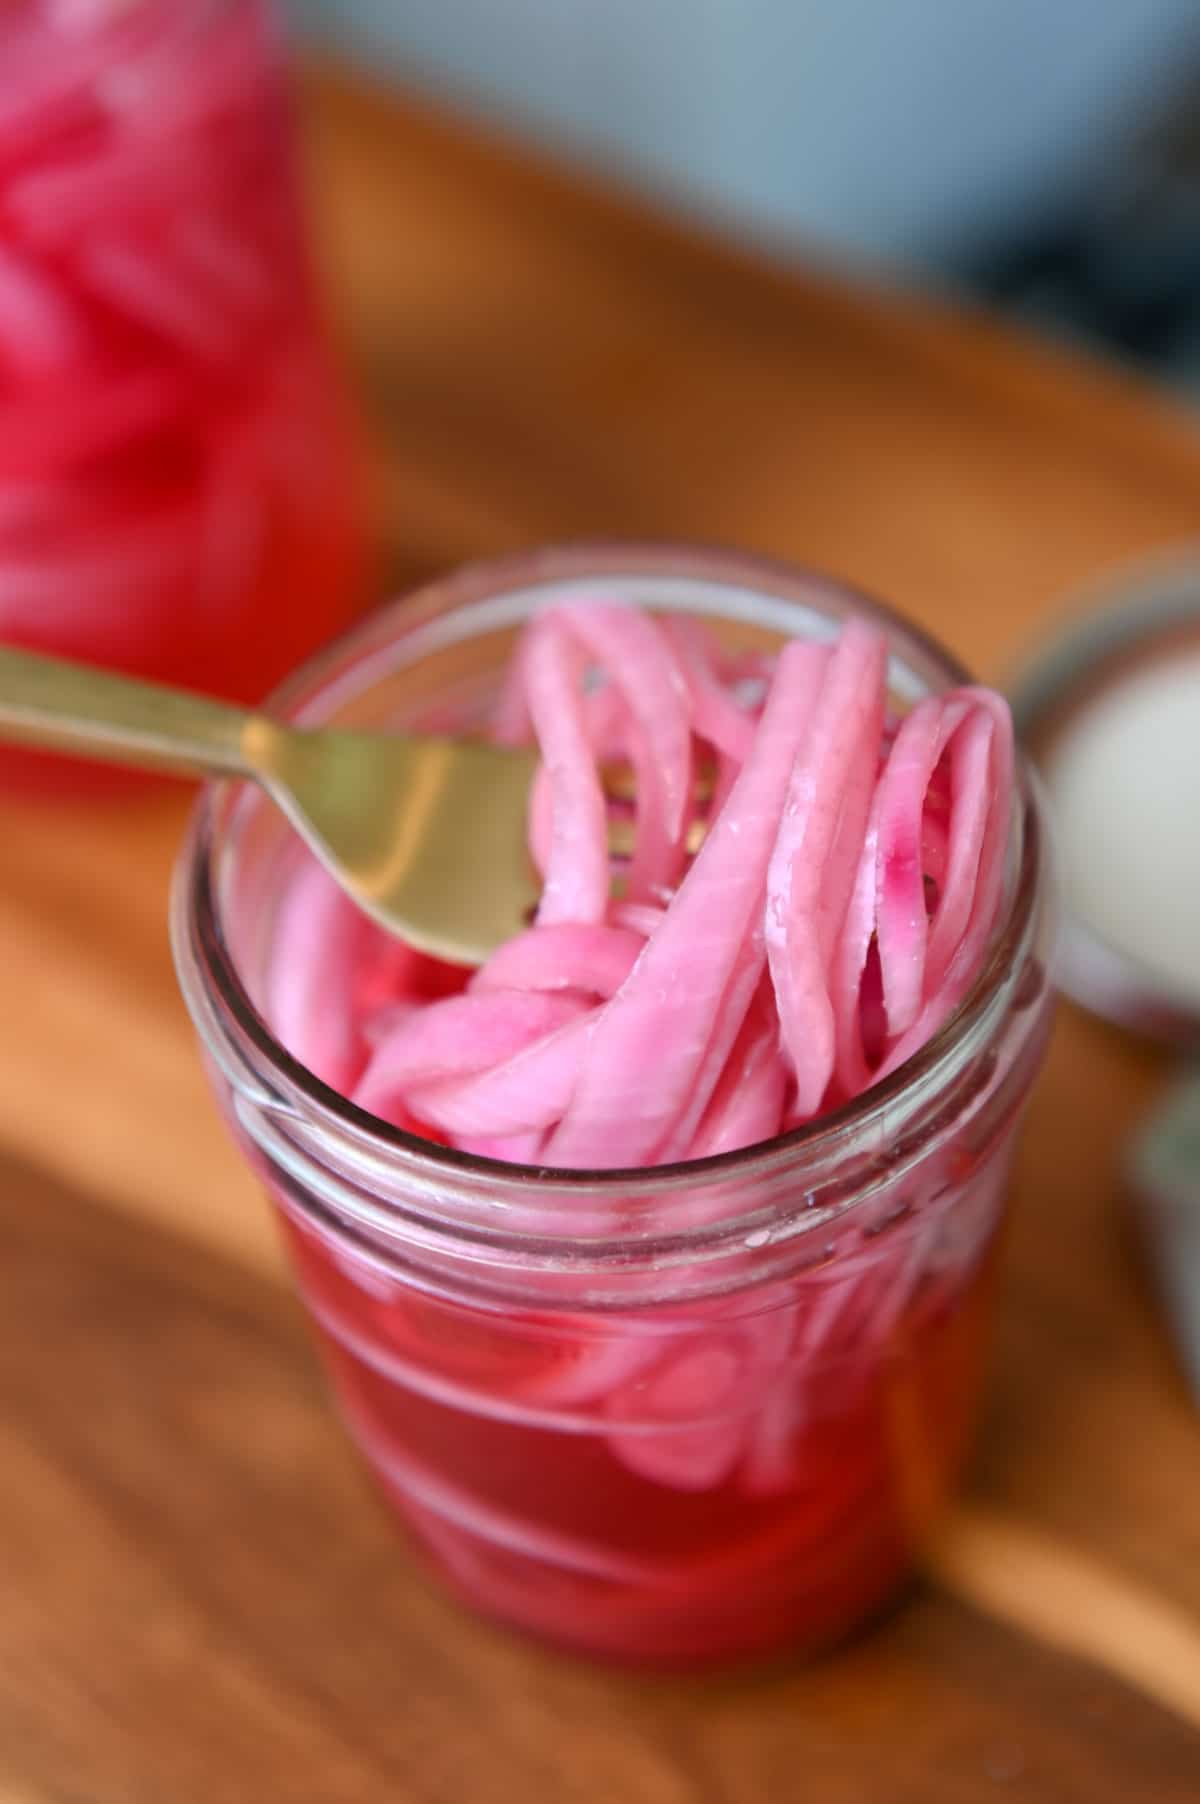
Step four: Let the onions sit in the brine for at least 2 hours before enjoying. You can eat them after an hour but they will be more flavorful the longer they sit. A full day is the ideal amount of time to wait but I can never wait that long!
Cassidy's tips and variations
Stove-top option
You can add the brine ingredients to a small saucepot and dissolve the salt and sugar that way instead of whisking together. To do this, place over medium heat and stir occasionally until salt and sugar are dissolved.
Pour the warm liquid over the onions. Let cool to room temp before closing and transferring to the fridge.
Using different veggies
Quick pickling works with a lot of different veggies. Try using this brine with sliced radishes, cabbage, or jalapeños for a similar result (but it won't be pink!).
Not enough liquid?
"Oops! I don't have enough liquid to cover the onions": If the onions aren't quite covered you can just add a splash of water. If they need a lot more liquid, add equal parts vinegar and water until they are fully covered. Leave at least ½ inch space at the top of the jar.
Different flavor options
- Vinegars: Try white wine vinegar, red wine vinegar or rice wine vinegar in place of cider vinegar for different flavors. Red wine vinegar will change the color of the onions.
- Sweetness: Adjust sweetness up to ¼ cup sugar or maple syrup. After that it will start getting too syrupy.
- Spices and seasonings: Add a pinch of ground cloves and orange zest for warming flavors. Other ideas: 3-4 crushed garlic cloves, fresh dill, 1-2 teaspoons crushed red pepper flakes (spicy!), 1-2 teaspoons whole black pepper or mustard seeds.
FAQ
Don't pickle/preserve these for the long term because this recipe is NOT tested for that. Instead, check out pickling recipes from reliable sources like National Center for Home Food Preservation.
Yes, you can use a 100% vinegar solution instead of water. I add water to decrease the acidity and tanginess of the onions.
No, from experience you do not need to add any of the onion skin to the jar. The reason some people do this is to ensure the onions turn bright pink, but I've never done this because the onions themselves are filled with pigmentation.
Serving ideas
Pickled onions are one of my favorite condiments to keep on hand because they are an easy way to add an instant punch of flavor to food.
Here are my favorite places to serve quick pickled onions:
- Bowls: Add to quinoa chickpea bowls, lentil bowls, and grain bowls.
- Tacos and burritos: Serve in cauliflower tacos, vegetarian nachos, burrito bowls, or bean burritos.
- Salads: Dice up the pickled onions and add to couscous salad, lentil salad, or on top of a kale salad.
- Toast: Serve on top of avocado or hummus toast for extra tang.
- Sandwiches: Add to brie grilled cheese, vegetarian Reubens, or tempeh BLTs.
I'm sure there are a lot more ways to serve pickled onions that I forgot, so let me know in the comments your favorite way to use these!
Storage notes
I find that quick pickled red onions are best within 2 weeks. After that, they start to soften and lose their texture.
This recipe is not written to be stored at room temperature, so you will need to keep the onions in the fridge to ensure food safety.
Looking for more recipes?
Looking for more quick pickling recipes? Check out my quick pickled red cabbage next!

Did you try this recipe? You can leave a star rating in the recipe card or a review in the comments below. Or check out my cookbook and keep up to date with my YouTube, Instagram, TikTok, or newsletter!
Recipe
Want to Save This Recipe?
Enter your email & I'll send it to your inbox. Plus, get great new recipes from me every week!
By submitting this form, you consent to receive emails from Cozy Peach Kitchen
Quick Pickled Red Onions
Ingredients
- 1 medium red onion
- 1 cup water
- ½ cup apple cider vinegar
- ½ cup distilled white vinegar
- 1 tablespoon white sugar
- 1 teaspoon table salt see note #1
Instructions
- Slice one red onion into very thin strips using a sharp knife or mandolin. Break apart the slices with clean hands. Add to a clean quart sized jar.
- Make the brine in a medium liquid measuring cup. Whisk together the water, vinegars, salt and sugar until the salt and sugar are fully dissolved. This should take about 30 seconds to a minute of vigourous whisking.
- Pour the brine over the onions. Add an extra splash of water or vinegar as needed to have one inch of liquid above the onions.
- Refrigerate for at least 2 hours. The liquid will turn bright pink and the onions should be more tender. Enjoy on tacos, grain bowls and in sandwiches. For best quality, keep refrigerated for 2 weeks.
Video
Notes
- Salt: I use table salt but kosher salt and sea salt both work.
- Can I pickle these? No! This recipe does not work for pickling/long-term preserving, just quick pickling.
- Spices and seasonings: Add a pinch of ground cloves and orange zest for warming flavors. Other ideas: 3-4 crushed garlic cloves, fresh dill, 1-2 teaspoons crushed red pepper flakes (spicy!), 1-2 teaspoons whole black pepper.
- Vinegar: Try white wine vinegar, red wine vinegar, or rice wine vinegar in place of cider vinegar for different flavors.
- Sweetness: Adjust sweetness up to ¼ cup sugar or maple syrup. After that, it will start getting too syrupy.
Susan says
Love this recipe! Great taste and so simple to make. I eat these on almost everything.
Cassidy Reeser says
It's really a game changer to keep a jar of these in the fridge! Thanks for the review!
Carmen says
Saved as a favorite, I like your blog!
Piper says
Saved as a favorite, I love your web site!
danielle says
can you reuse the brown or do you have to make a new batch
Cassidy Reeser says
I would remake the brine if you're making a new batch.
Milton Villacorta says
Thank you for sharing this helpful recipe!